Dashboard
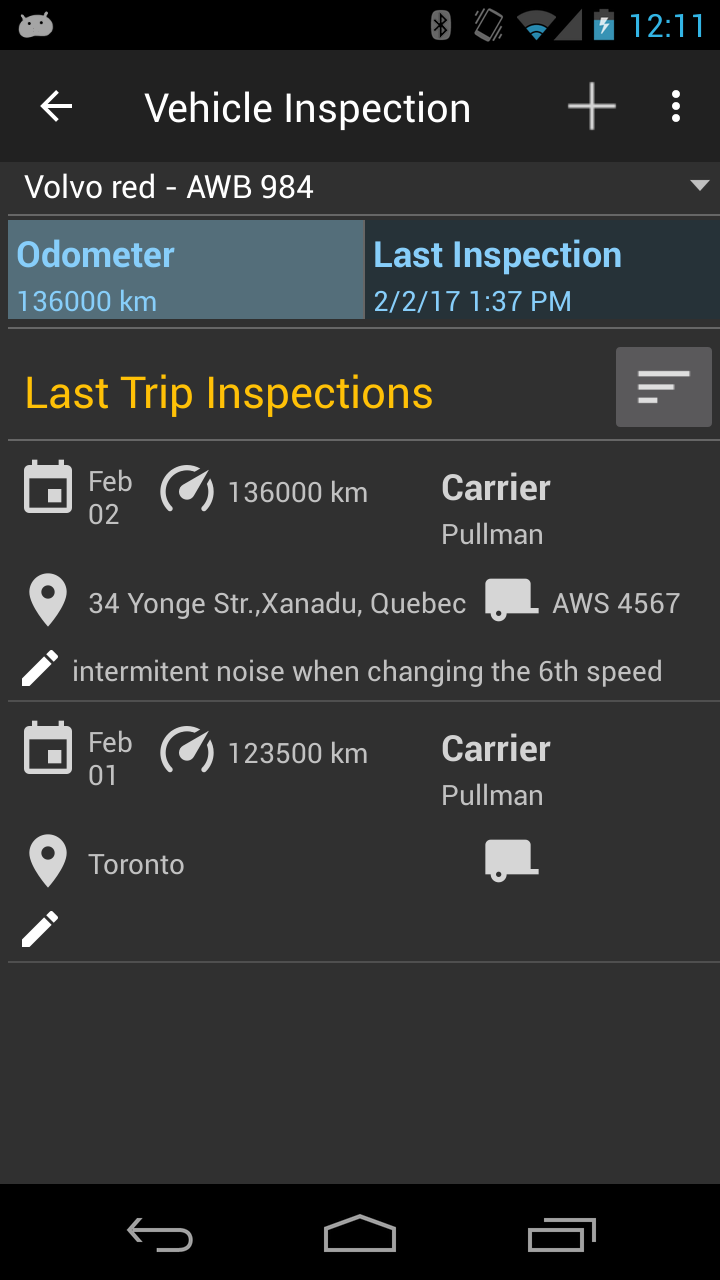
The dashboard has a vertical layout presentation:
- with the vehicles managed shown in a drop down list
- followed by details about selected vehicle: the odometer and last inspection recorded
- followed by a summary of the last 10 driver vehicle inspections ; in the summary the user has a glimpse of the date, location, carrier, trailer info and odometer at the date of the inspection and the note/remarks of the vehicle inspection
From this screen, you can:
- change the vehicle (and accordingly displaying the vehicle inspections associated with it)
- change the application settings
- see the menu (swipe from left to right)
- filter the selection of the vehicle inspections (press the button on the same line with “Last Trip Inspections”)
- add a new driver vehicle inspection
- view ONLY vehicle inspections recorded (records can only be viewed, deleted or emailed)
Note: The application does not allow to change a vehicle inspection if it is not the last for selected vehicle.
Settings
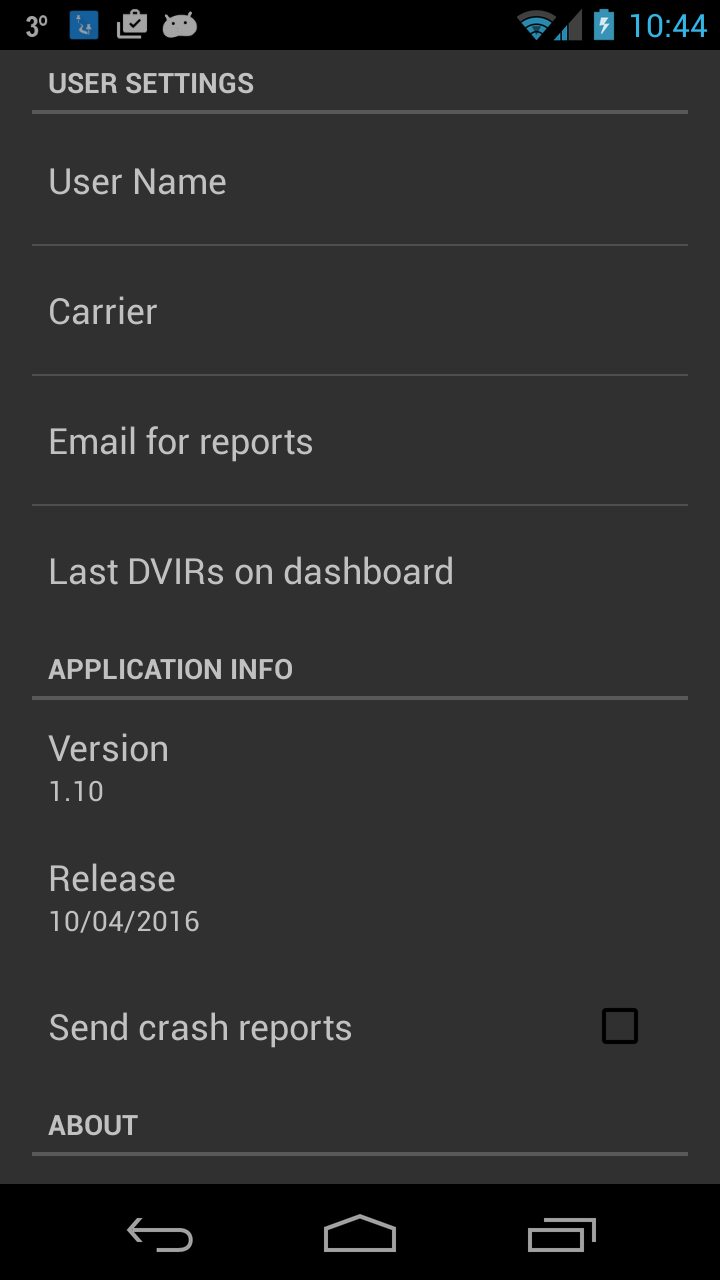
The settings allows to fill-up some of the fields of the inspection with constant values (that can be changed before the report is saved) for report speed generation :
- User name
- Carrier
- default email address for reports
Vehicles
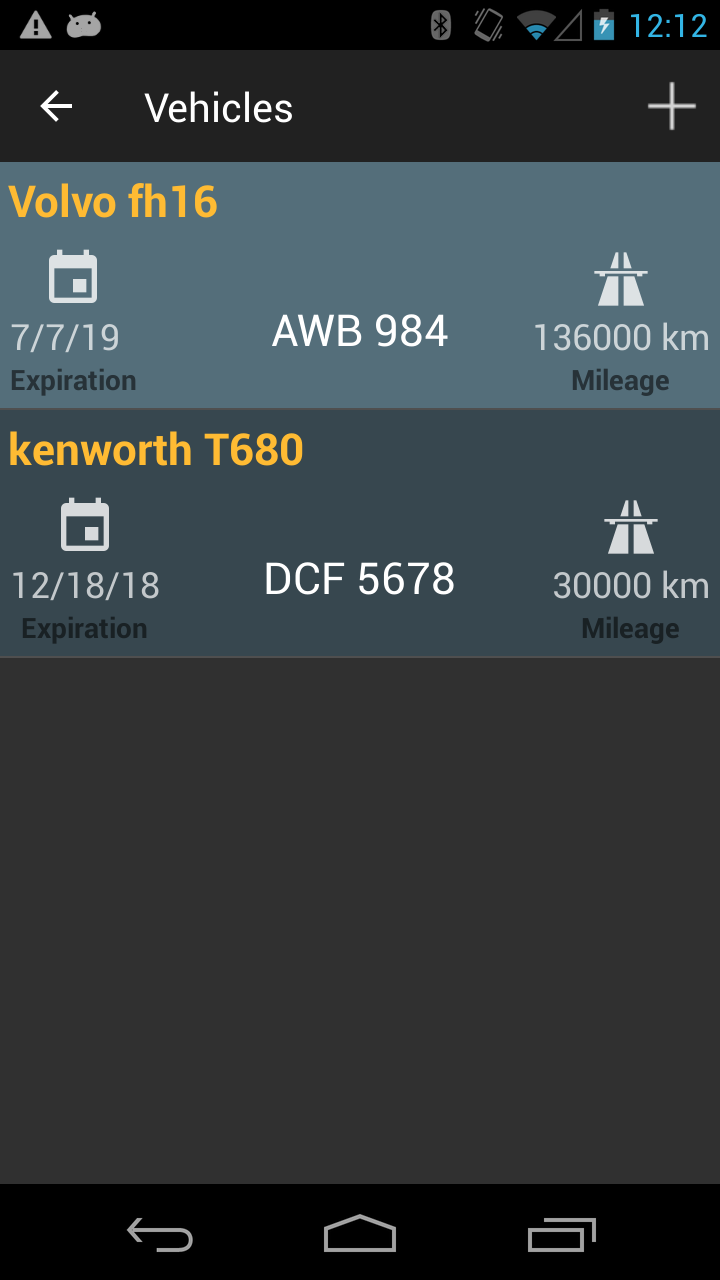
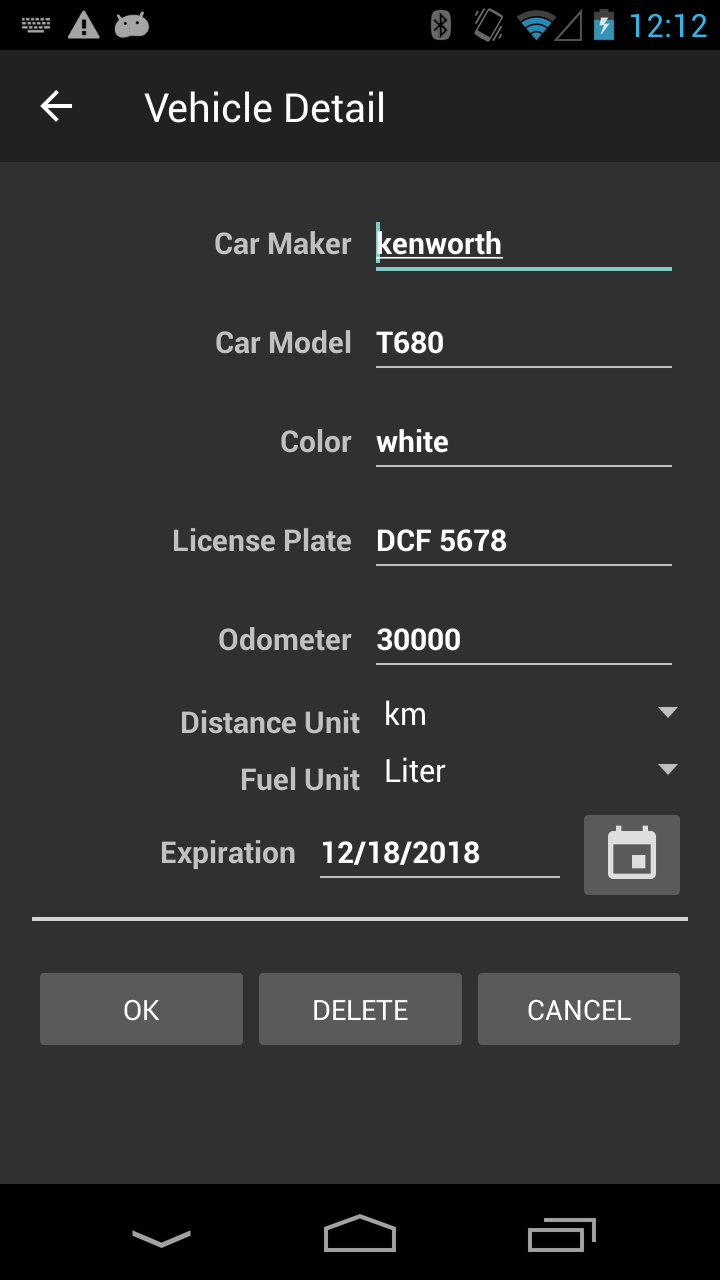
The main screen for vehicles is a simple list with the name of the vehicles, license plate and the current odometer value (updated with each vehicle inspection). By selecting “Add” (+) button the second screen allows to change/add vehicle info.
IMPORTANT : The free version allows only one vehicle to be stored internally.
Filtering DVIRs

The user can see maximum 10 vehicle inspections but can move the window selection by time.
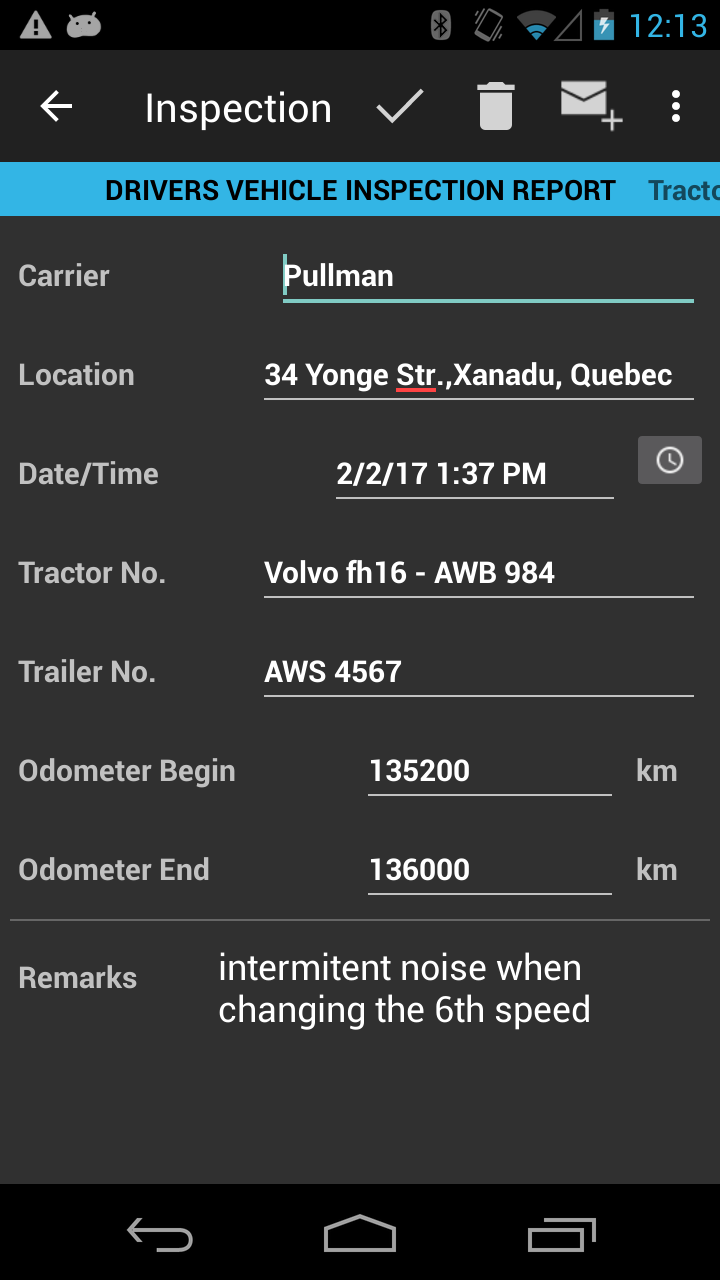
Filling up DVIR – detail

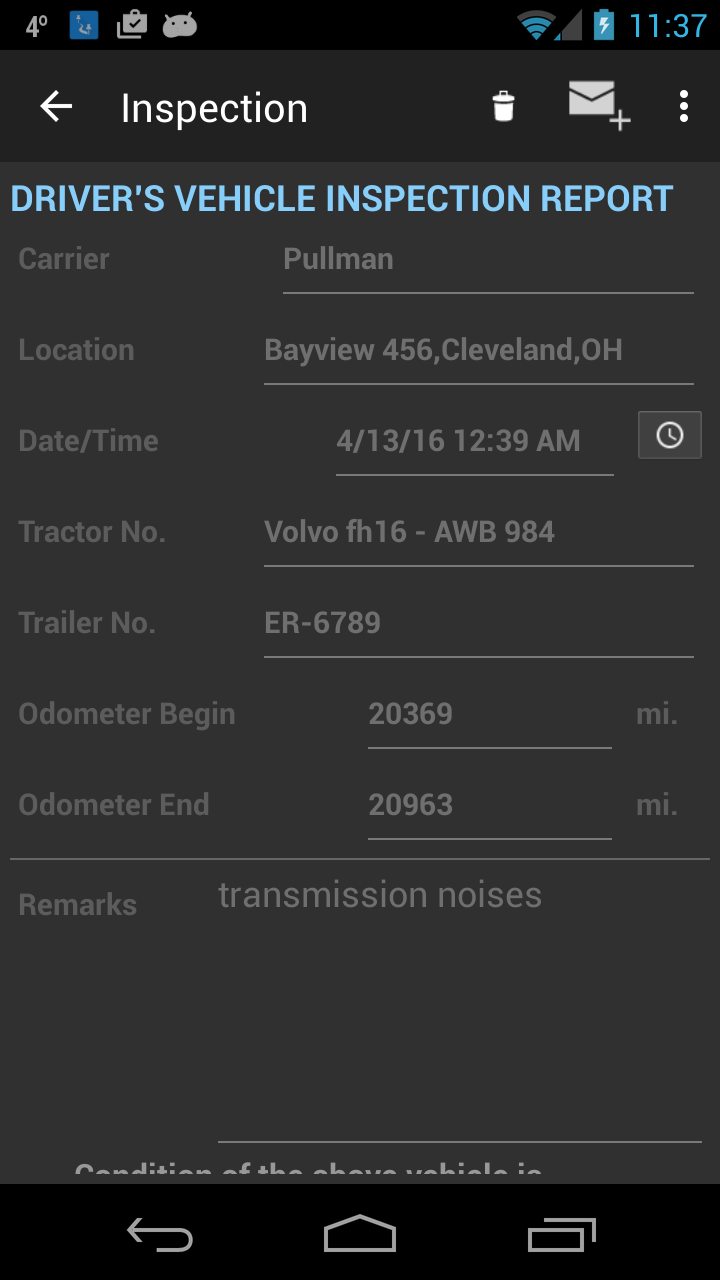
This is the most important part of the application and consists in three screens accessible by swiping (left/right). The first screen is the general data about the vehicle and trailer inspection (see the screens above). The tractor information is predetermined by the truck/vehicle selection in the dashboard screen.
The date/time selection is launching a dialog for picking date and time (is not a free text field). For signatures the user has to press the pen icon on the right side of the field which launches a special window to capture signatures. At the same time, the date of the signature is recorded.
In order for the report to be saved several conditions have to be passed:
- carrier name cannot be empty
- location cannot be empty
- odometer numbers have to be higher than the current value of the odometer of the vehicle; with each inspection the odometer is increased automatically. In case the user entered too high values, the last entry can be erased and automatically the odometer take the value from the last vehicle inspection
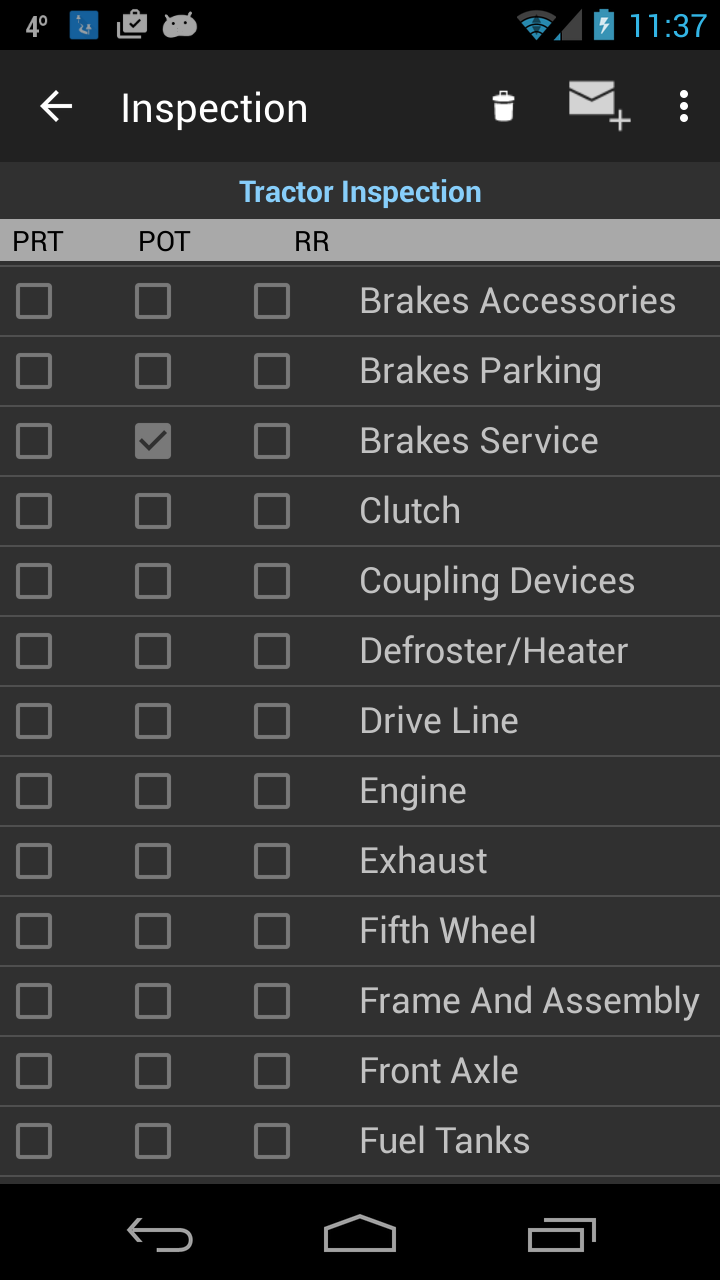
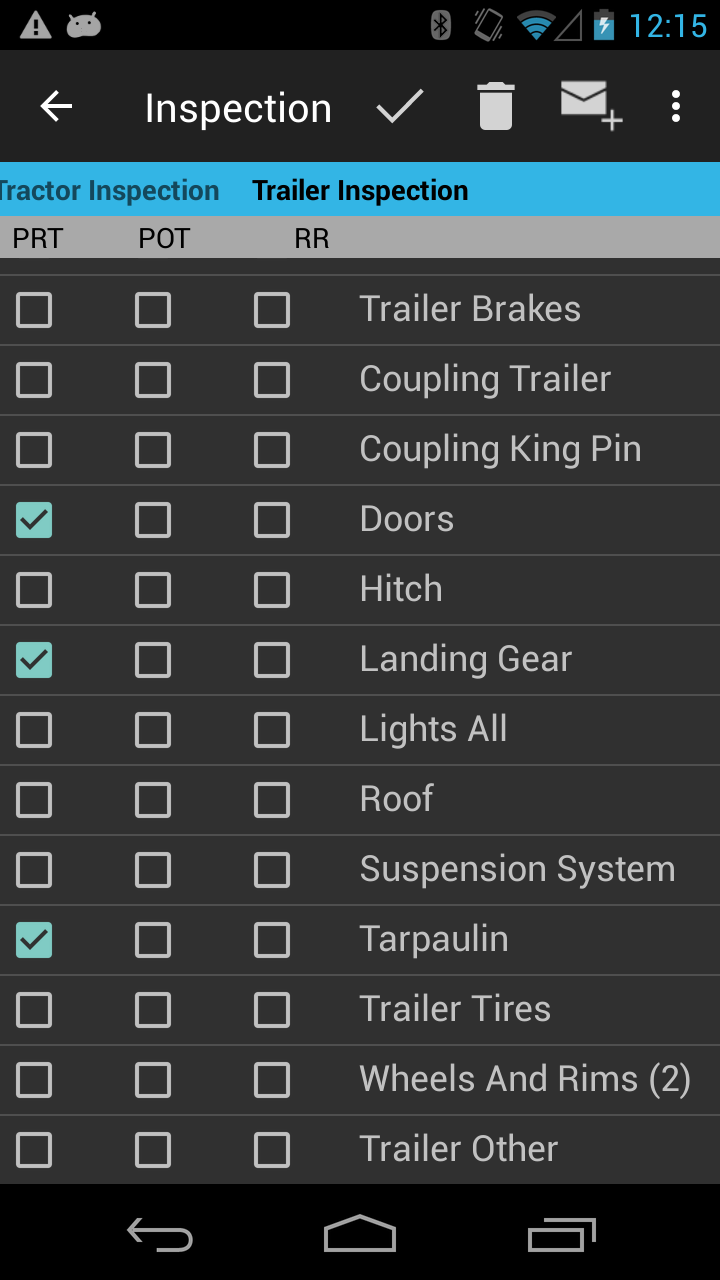
For checkpoints of the tractor, the user has to swipe the screen from right to left and the next screen is shown. To come back to the first screen the reverse gesture is needed (swipe from left to right).
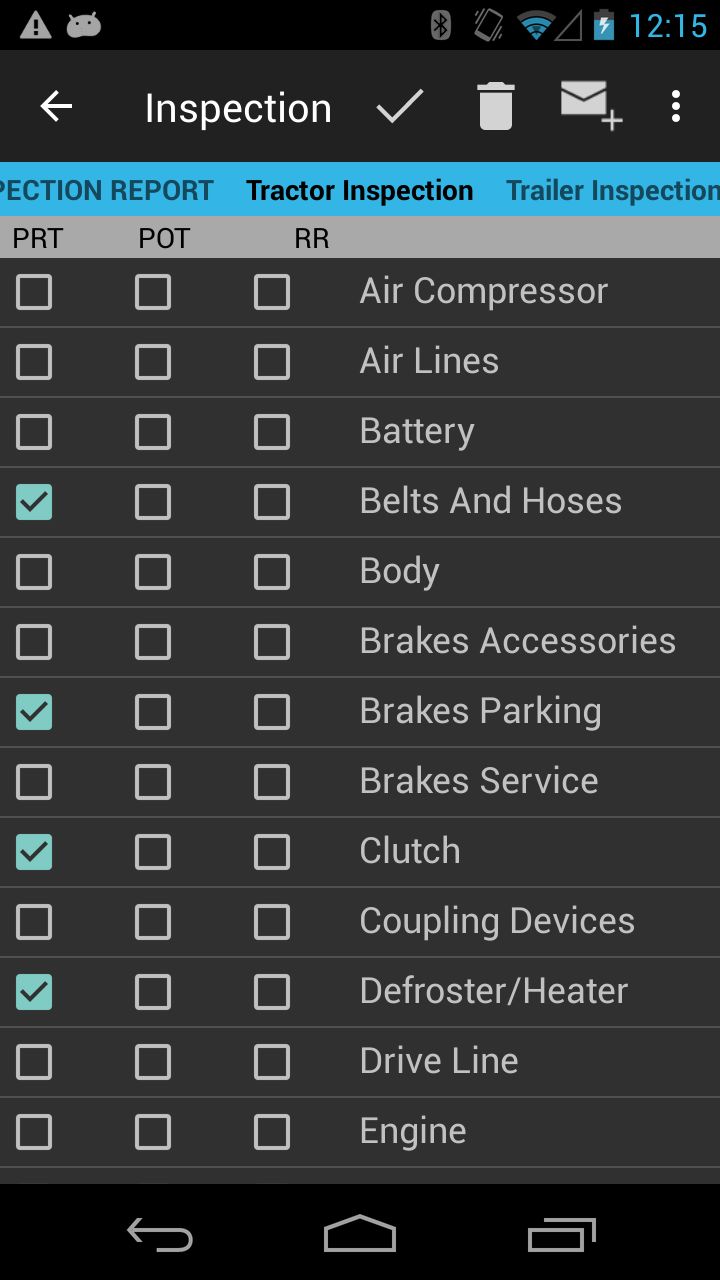
For checkpoints of the trailer, the user has to swipe the screen from right to left and the next screen is shown. To come back to the second screen (tractor checkpoints) the reverse gesture is needed (swipe from left to right).
Anytime the information can be saved by pressing the Ok button in toolbar, or deleted or emailed.
IMPORTANT : The free version allows only 10 vehicle inspection to be stored internally.
If you want to use only the FREE version, delete old vehicle inspections.
For deletion, the user has to confirm. Reports are emailed using clients installed in device (see screen below).
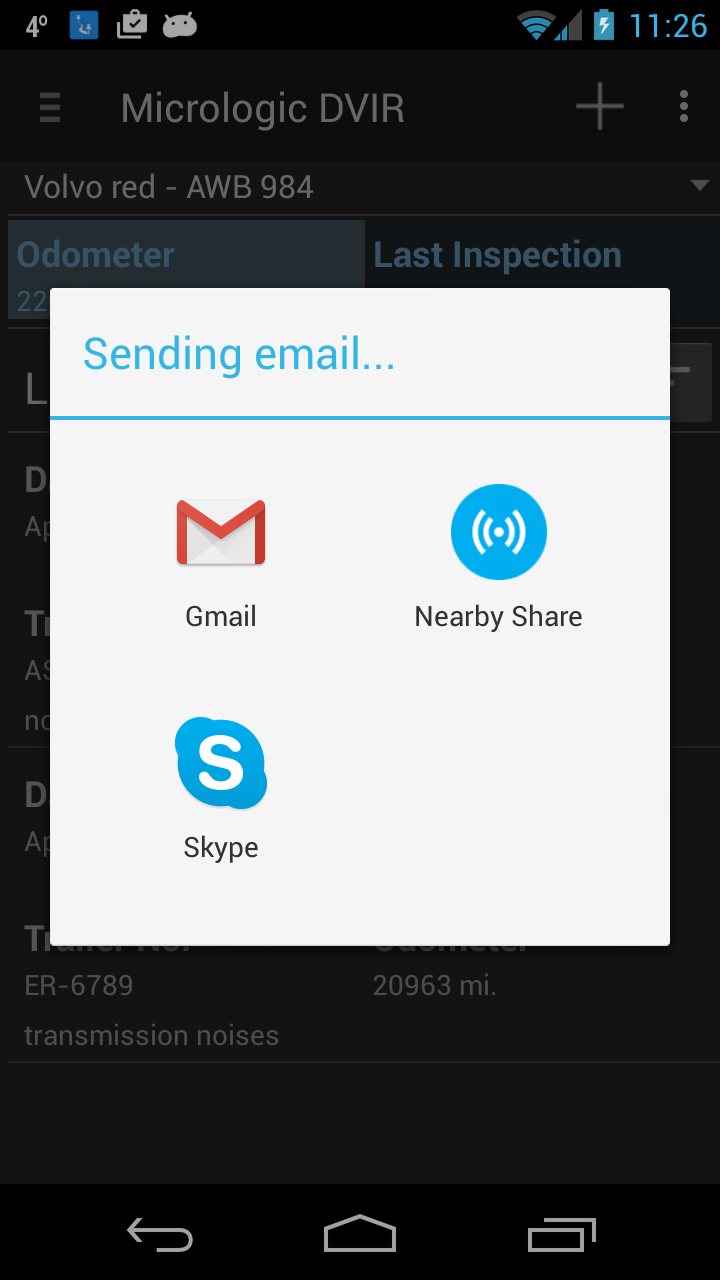
IMPORTANT : The free version allows only one email vehicle inspection generated every three days.
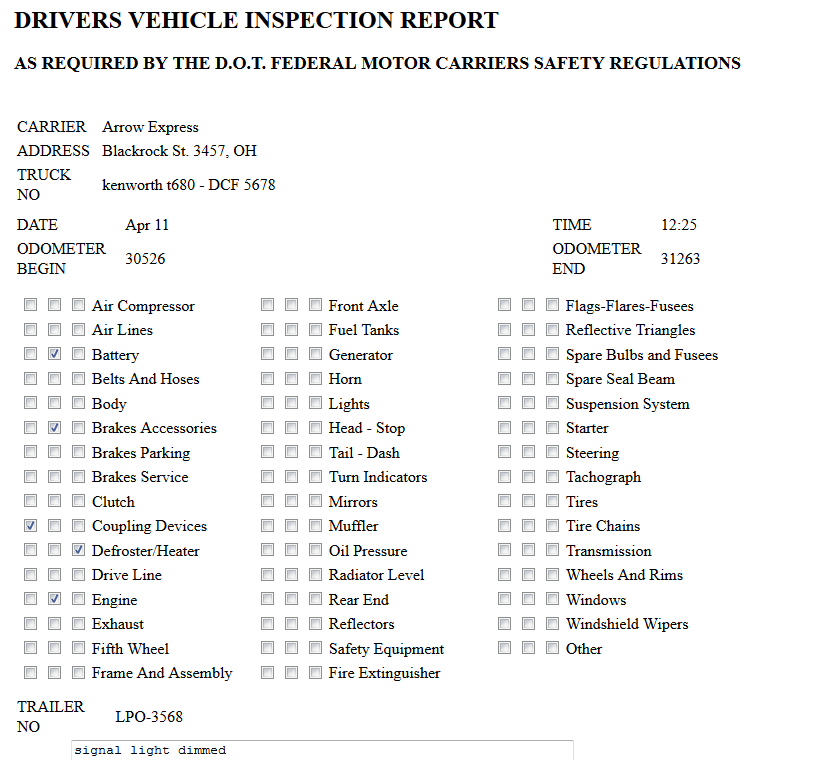
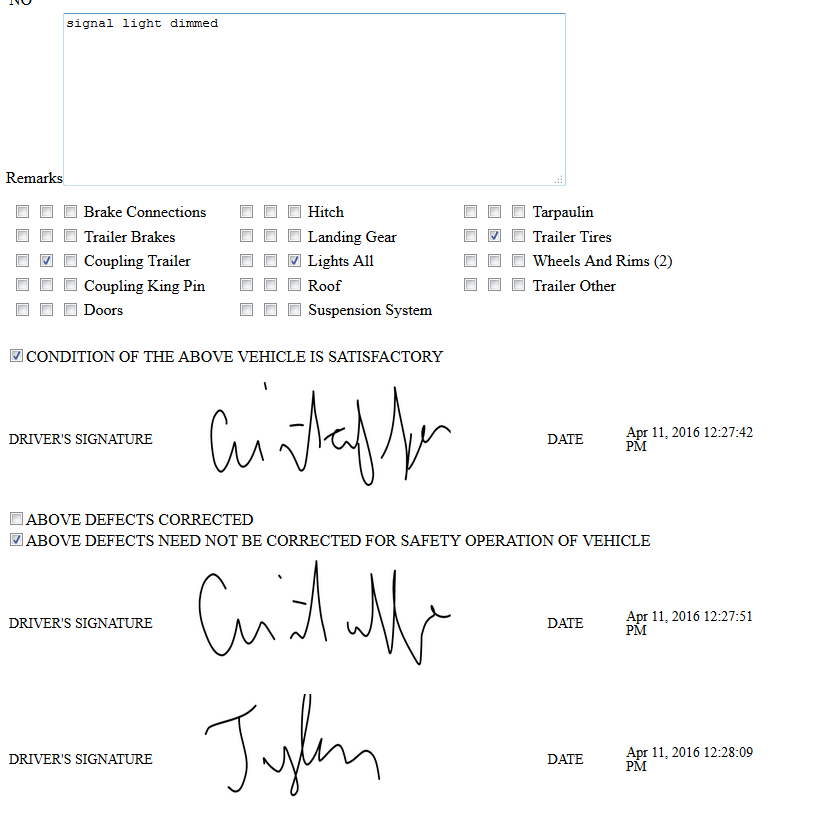
The report looks as below when opened in any email client (it comes as an attachment).
Note: All vehicle inspections but the last one can only be viewed and the interface is graying out all the input fields. For the same reason, the toolbar allows only delete or email operations.